Posts

Image
Some of the GRP alongside a part painted with Crystic primecoat and sanded back as a comparison. I am very happy with the results so far and will be using this method on all of the GRP parts. It's time consuming but satisfying when the work starts to pay off.

Bodywork Development

Image
Before I explain how I've done the bodywork I must also explain that due to lack of space and money open moulding is the only option open to me to complete the work. The bodywork on the trike is GRP over foam formers. After much trial and error I finally decided to do it as follows. I used ply and foam to make the body panels up. When the former is sanded to it's final shape I let it rest for a few days and then cover it with aluminium tape I then lay up the resin and matting over the former. usually two layers and allow it to cure for 12 hours. I then carefully 'pop' the GRP off the former. Any more than two layers it can crack, any less and it flops and won't hold shape while you back it out. For large flat panels I laid 3mm core mat out on a flat surface and added resin. Once cured it's easy to mark out your panels and cut it with a slitting disk or hack saw blade in a jig saw.  I used bits of ducting to make formers for the side duc

Walk around pictures

Image
I've had the trike back out to take pictures from a few different angles so I can use them to look at the lines on the trike. I'll print a few off and borrow the wife's crayons (yes she has her own crayons) and do a bit of doodling to see what looks best before I do much more in respect of body panels.

Moving along

Image
As you can see its back on it's wheels again. I've been working on the bodywork on and off while other jobs are either waiting for parts or for engineering jobs that are outstanding.   As you can see I've decided to lose the bike plastics and subframe. I think I can make it a lot neater so it looks less like a bike rammed up a go karts bum. Hand brake caliper. As you can see the hand brake mount and caliper are now fitted on the custom made steady. We just have the cable to sort and the original rear caliper.
Image
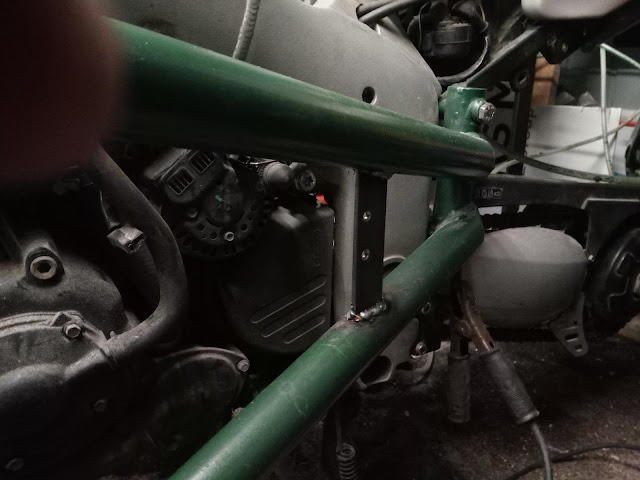
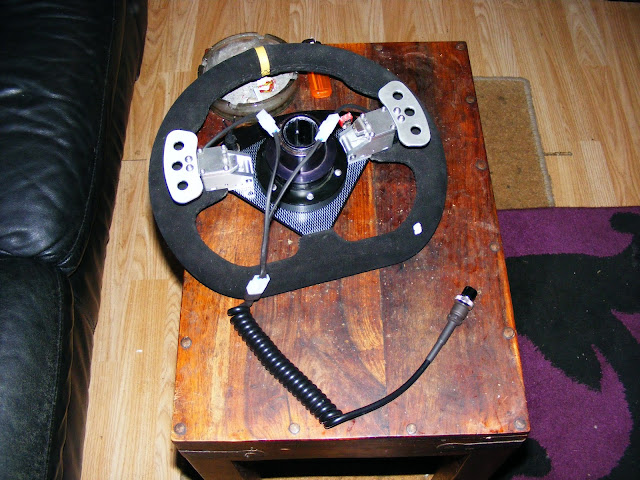
               Kliktronic Unit Mounting I'm using a Kliktronic Gear Shift  along with the paddle set in my earlier posts.  Once James and  I had figured the hole centres for the clamp mounting out it was a simple job to fabricate one from some 30x5 mm flat bar. We then used a gear lever from a VFR 750 F and the rose joint from the ST welded together to sort the linkage out between the Klikktronic and the input shaft. Simple engineering, simple solutions. I need to get some decent bolts for the mounting, the ones in the picture are just some I had in the garage. I'm almost ready to modify the rear plastics to accomodate the diagonals to the bike frame. The rear end should be done in the next few days health permitting.
Image
Steering wheel set up. My steering wheel fitted with Kliktronic paddles, a button for the horn and a switch for the indicators. I still have to get a high/low beam switch fitted with a new cable and socket to accomodate all of the switch gear I need on the wheel.  With the back injury the less I have to reach for switches etc will make it a lot easier to ber safe without causing any additional discomfort and allow me to have as much pain free fun as possible.
Image
My previous trike builds.          The first a little reliant I built with a mate, I learned a lot putting this together. My gorgeous GSXR 750 WP, I rebuilt this bike after getting it from a mate in a very sorry state. I had John Weaver build a trike back end for it when I couldn't ride it anymore. It ruined a perfectly good sportsbike and turned it into a beast of a trike. Eventually I had to give up riding with handle bars due to a back injury and thats what inspired the RT build.
Image
Dutton 1600 Mexico. I still miss this little car. Rough as, but so much fun to drive. 100 bhp and a live axle makes for some interesting handling in the twisty bits. If my trike is anything like as much fun to own and drive I'll be over the moon.